Listening activities
Give students a file to work on at their own pace
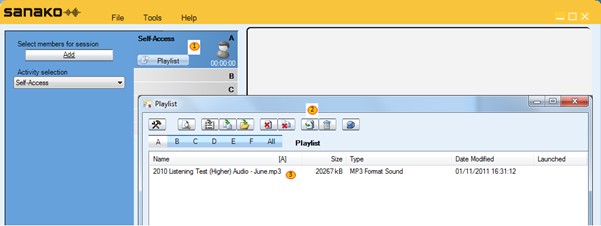
1. Click Playlist
2. Click Add and browse for the file you want your students to work on
3. The file will then be listed in the top section of the playlist and will also appear in the playlist area of the student player as shown below.
Tips: You can add as many files as you want to the list and of any type e.g. Audio, Video, Pictures, Documents, Presentations, Web links etc…
You can Copy and Paste to the Playlist area
You can Drag and Drop to the Playlist area
Make sure you delete files in the playlist at the end of the lesson to make sure you start the next lesson with a blank playlist
Make use of individual Tutor playlists
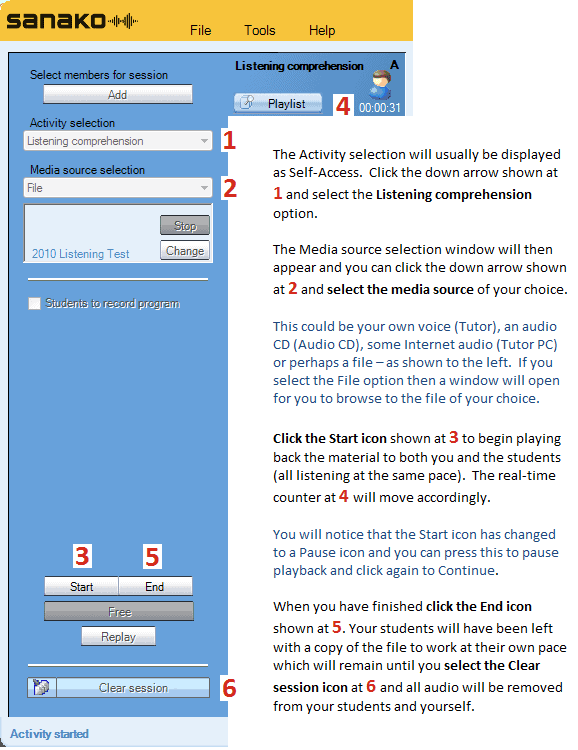
Play audio to your students at a pace that you decide
Speaking activities
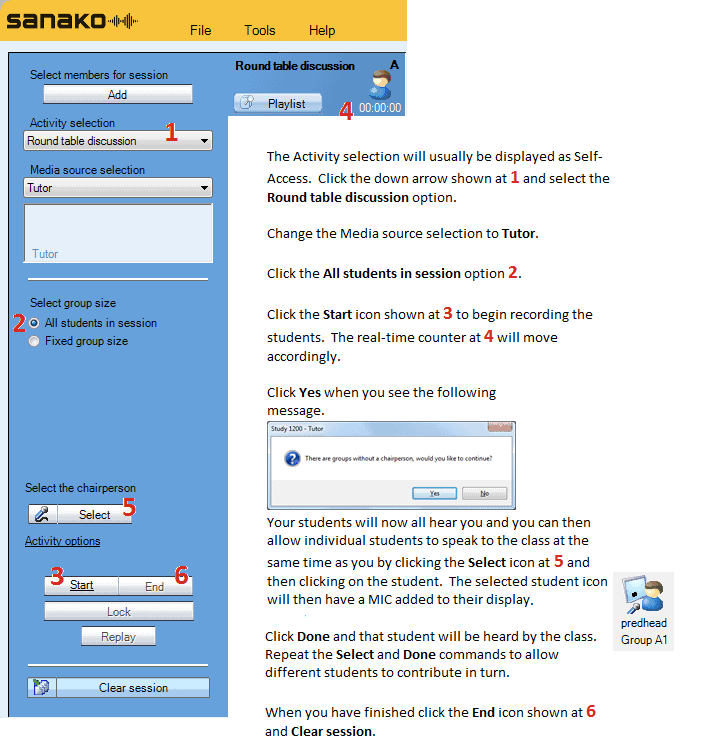
How to create a whole class discussion environment
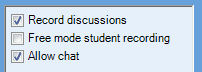
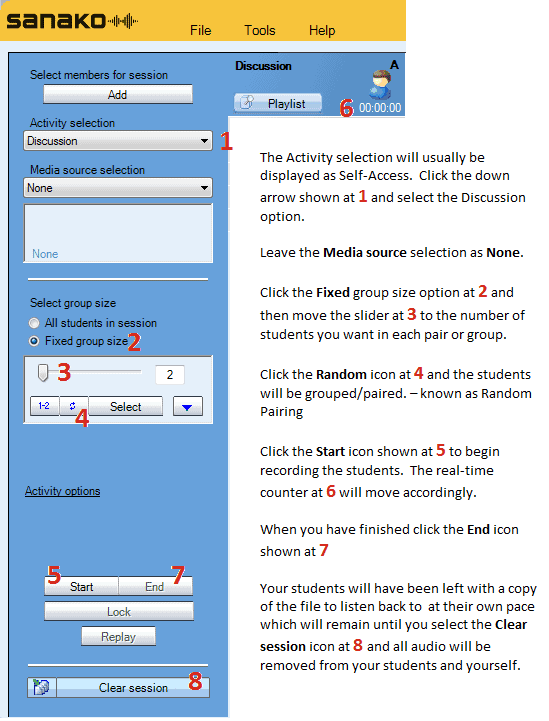
If you want to record the class discussion then select the Record discussions option in the Activity options menu.
You may also want to allow the students and yourself to interact using a textual chat window whilst talking.
If you enable textual chat then the students will see the following window appear on their player.
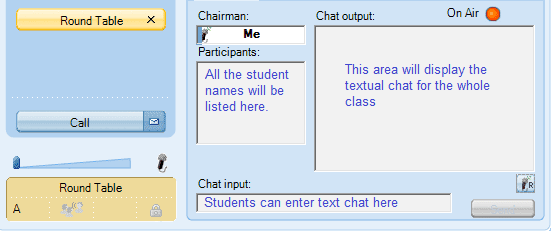
Students can “request” the microphone by clicking the microphone icon on their end. If they are given the microphone by the teacher, the On Air icon will illuminate and the Chairman: field will display Me as shown above.
How to pair or group students to talk to each other
If you want to listen to any of the pairs or groups once the activity is started then simply click on any of the students in that pair or group.
If you click the Discuss icon whilst listening then all the pair/group members will hear you.
The members of the group are shown whilst monitoring.
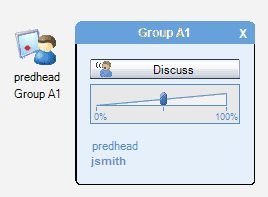
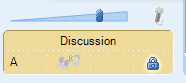
Students can find out who they have been paired or grouped with by simply clicking the word Discussion in the bottom left part of their player.
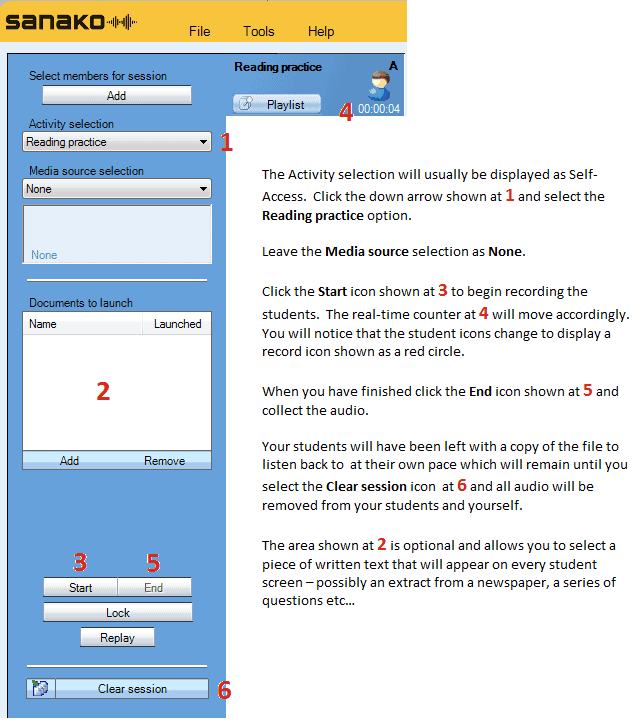
Activity Options:
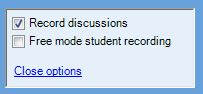
+ Record discussions: to collect all the student pair/group discussions.
+ Free mode student recording: to only collect audio when the students have pressed their SPEAK icon.
Tip: The Free mode student recording option is very useful if you only want to collect the audio when the students actually start the exercise – it may be that the first minute or two is spent setting up the exercise and deciding on who is who in the role play?
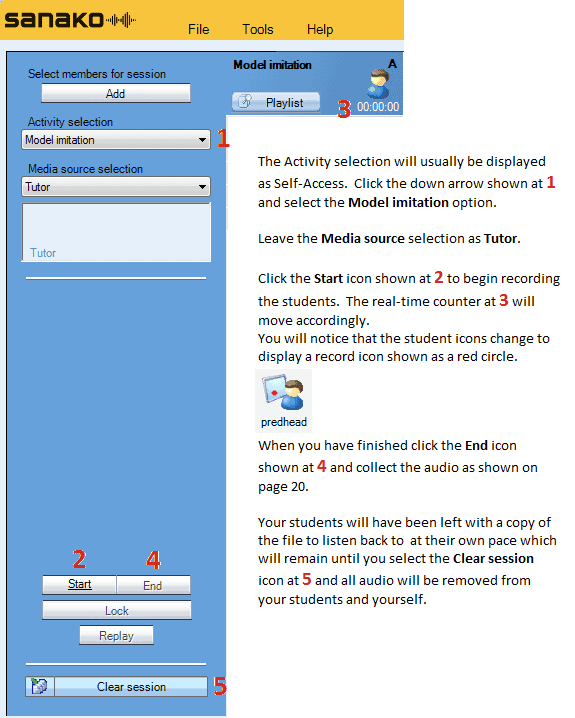
How to perform a “drill type” activity
Why do this? Ideal preparation for listen and repeat exercises; listen and translate routines or perhaps question and answer sessions. Save time by doing this to the whole class at once.
Once you press the End icon the following screen appears.
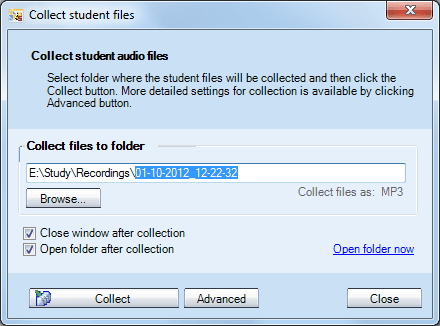
Click the Collect icon and every student recording will be collected as an individual file to the location specified as an MP3 file.
The files will be named according to name given under each student icon on the teacher screen e.g. predhead.mp3, jsmith.mp3.
Tips: The recordings will only contain the student responses and will not include the teacher voice. However, if you want to collect your voice as well then you can select the Advanced icon in the window shown above and tick the option to collect the Program track.
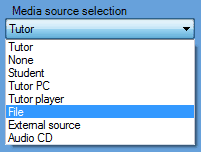
You may also want to use a different audio source from that of your voice. To do this simply, click the Media source selection drop-down menu and you could for example select an existing MP3 file or use an audio CD.
How to record and collect student recordings automatically
Why do this? Ideal preparation for speaking tests – simply provides students with a topic area and then allows them to speak for a given time and collect their recordings back. Once collected you can double click on any file and play it back through the class speakers for peer-assessment.
How to speak to the whole class
Simply click on the grey Talk icon on the tutor screen.
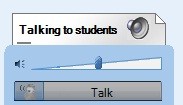
The “Talking to students” and loudspeaker icon on the Tutor interface becomes active. The black moving bar indicates when you are speaking – sometimes known as All Call.
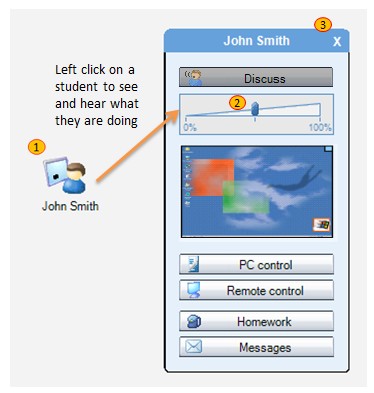
How to speak with an individual student
1. Click the left button on your mouse whilst the pointer is over a student.
2. Click the Discuss icon – it will change to a darker colour when active
3. When you have finished listening then click the “X” at the top of the window.
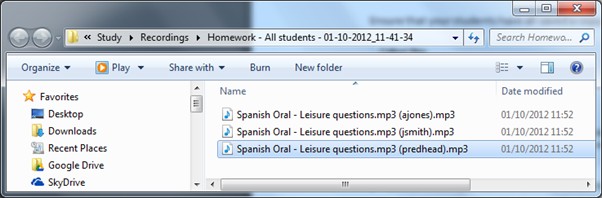
How you can collect in student work at the end of the lesson
Why do this? Ideal for marking purposes – collect in student work to take away on say a USB pen stick. Gather evidence of student attainment for on-going personal development plans and future lesson planning. Ensure that you have a copy of your students work for the time when they say “I have lost it!”
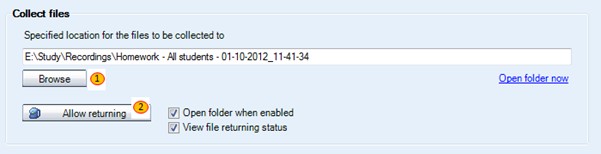
Click the Homework icon and the collect files screen will appear.
Ensure that your students have all saved a copy of their work before you collect it in.
1 – Decide where you want to save the student work – it can be anywhere such as a USB pen-stick or your My Documents area. By default, the student work will be collected to a pre-defined shared area on your network (usually a directory of your shared network languages folder) and a directory will be created based on the date and time.
2 – Click the Allow returning icon and your students will be shown a homework return screen.
All they need to do is to browse for their saved work and then send – shown as 1 and 2 below.
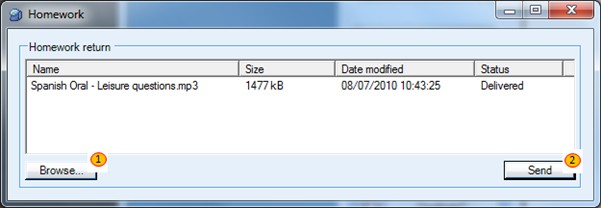
As your students send their work you will see them appear in the tutor collection folder below. Each file sent clearly shows who sent it in the brackets part of the filename.